

Calorie Deficit Method Using HRV and Resting Heart Rate

Goal: use HRV and resting heart rate to set and maintain your calorie deficit
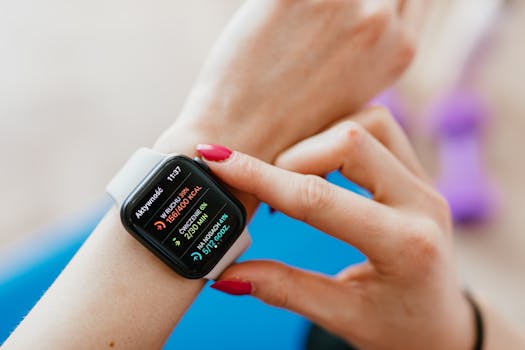
The calorie deficit method using HRV and resting heart rate is a practical way to avoid “set it and forget it” dieting. Instead of assuming your metabolism and recovery stay constant, you use two recovery signals—HRV (heart rate variability) and resting heart rate (RHR)—to guide how aggressive your deficit should be on a given day or week. The result is usually a deficit that’s large enough to drive fat loss, but conservative enough to keep performance and recovery from collapsing.
In this approach, you don’t treat HRV and RHR as magic fat-loss switches. You use them as feedback. When recovery looks strong, you can hold or slightly increase your deficit. When recovery looks stressed, you reduce the deficit and/or adjust training so you keep moving toward fat loss without prolonged fatigue.
Required preparation and setup
Before you start changing calories based on HRV and RHR, make sure your measurements are consistent. HRV is sensitive to sleep quality, alcohol, illness, and even travel. RHR is also affected by stress and hydration. Your goal is not perfect readings—it’s reliable trends.
Tools and setup you’ll need
- A wearable or chest strap that reports HRV and resting heart rate. Choose one device and stick with it for the duration of your plan.
- A daily tracking method for calories, training, HRV, and RHR (notes app, spreadsheet, or training log).
- A consistent “resting” measurement routine (same time window each day, similar conditions).
- Your baseline calorie target from either maintenance testing or a structured estimate (details below).
Baseline steps you should complete first
- Pick a measurement window: measure upon waking, before caffeine, and ideally after using the restroom. Try to keep this within a 30–60 minute range each day.
- Collect at least 10–14 days of data before making calorie changes. You’re building your normal range for HRV and RHR.
- Record training load: log sessions using a simple scale (e.g., easy/moderate/hard) or track total volume and intensity.
- Confirm your starting calories: estimate maintenance using your current weight trend and intake. If you’re already losing weight, you can back-calculate an approximate maintenance. If you’re stable, your current intake is closer to maintenance.
How to interpret HRV and RHR trends
HRV typically decreases when recovery is stressed (poor sleep, high training strain, illness). RHR often increases when your body is under strain. The exact direction depends on your baseline, so focus on your personal trend rather than generic numbers.
Step-by-step: run the calorie deficit method using HRV and resting heart rate
Step 1: set a starting deficit that won’t break recovery
Start with a moderate deficit. A common starting point is 10–20% below your estimated maintenance, or a daily reduction that produces about 0.25–0.75% body weight loss per week for most people. If you’re new to dieting or you train hard, start closer to the smaller end.
Practical example: If your maintenance is 2600 kcal/day, a 15% deficit puts you at ~2210 kcal/day. Use that as your baseline for the first 7–10 days while you observe HRV and RHR trends.
Step 2: define your “normal” ranges for HRV and RHR
After 10–14 days of consistent measurements, calculate a baseline for each metric. You can do this in a simple way:
- HRV baseline: find your average HRV and also note the typical low and high range.
- RHR baseline: find your average RHR and note the typical low and high range.
Instead of chasing single-day fluctuations, define a threshold for “recovery looks stressed.” One easy method is to use your personal averages:
- Consider recovery stressed when HRV is below your baseline trend and RHR is above your baseline trend for 2 consecutive days.
- Consider recovery strong when HRV is above baseline trend and RHR is below baseline trend for 2 consecutive days.
If your device provides a readiness score, you can use it as a shortcut, but still validate with the actual HRV and RHR readings.
Step 3: create two calorie adjustment levels
You’ll need rules for what to do when recovery is stressed versus strong. Prepare two adjustment levels ahead of time so you don’t improvise daily.
Recommended structure
- Default deficit: your starting calorie target (e.g., maintenance minus 15%).
- Recovery deficit (or maintenance bump): a smaller deficit or maintenance for stressed days.
For example:
- Default: 2210 kcal/day (15% deficit)
- Recovery: 2350 kcal/day (about 5–8% deficit or close to maintenance depending on your true maintenance)
Choose the size of the adjustment based on how sensitive you are to dieting. If you’re prone to fatigue, use a smaller deficit reduction (or even maintenance on the worst days). If you’re recovering well, you can use a slightly larger deficit on strong days.
Step 4: adjust calories based on 2-day HRV/RHR patterns
On each day, check your HRV and RHR relative to your baseline trend. Then apply the rule after you have two days of confirmation.
Use this decision rule:
- If HRV is trending down and RHR is trending up for the past 2 days, treat recovery as stressed.
- On the next day, switch to your recovery deficit (higher calories) and keep training intensity conservative.
- If HRV is trending up and RHR is trending down for the past 2 days, treat recovery as strong.
- On the next day, hold your default deficit or slightly increase the deficit if progress has stalled (small changes only).
Practical example: Your baseline HRV is ~55 ms and baseline RHR is ~52 bpm. Days 1–2 show HRV ~45–48 ms and RHR ~54–55 bpm. Starting day 3, you move from 2210 kcal to 2350 kcal and reduce hard sets or shorten the session. If days 3–4 recover (HRV returns toward 52–55 and RHR back near 52), you return to 2210 kcal on day 5.
Step 5: tie training load to your recovery signals
Calorie adjustments work best when training load matches recovery. If HRV and RHR suggest stress, you can keep calories higher and also reduce the strain of training. If HRV and RHR suggest recovery is good, you can train harder while staying in the deficit.
Simple training rules
- Stressed recovery (HRV low, RHR high): reduce volume by 20–40% and avoid adding new intensity. Keep technique-focused work.
- Strong recovery (HRV high, RHR low): maintain your plan. If you’re behind on weekly training volume, you can catch up within reason.
- Mixed signals: keep calories at default and choose the “least risky” training option (moderate volume, no PR attempts).
This keeps your deficit from turning into a prolonged stress cycle that can cause performance drop, sleep disruption, and plateaus.
Step 6: evaluate progress using weekly outcomes, not daily scale noise
HRV and RHR help you manage recovery daily, but fat loss is assessed over time. Use weekly trends for body weight and measurements.
Track at least:
- Average body weight over 7 days (not single-day changes)
- Waist measurement weekly or every 2 weeks
- Training performance markers (reps at given loads, total weekly volume)
- Energy and sleep quality notes
If your weekly fat loss is on track and HRV/RHR are mostly stable, you’re using the method correctly. If fat loss stalls for 2–3 weeks while HRV/RHR show stress, you likely need a better recovery strategy rather than a bigger deficit.
Step 7: fine-tune deficit size after 2–3 diet weeks
After you’ve run the method for a couple of weeks, adjust your default deficit based on both:
- Rate of fat loss (weekly weight trend)
- Recovery stability (how often you have stressed 2-day patterns)
Adjustment options
- If you’re losing weight but HRV/RHR frequently shows stress: reduce the default deficit slightly (e.g., another 50–150 kcal/day).
- If fat loss is slower than expected and recovery is stable: increase the default deficit modestly (e.g., 50–100 kcal/day) rather than making large jumps.
- If you’re not losing weight and HRV/RHR is stressed: keep calories closer to maintenance and reduce training strain first. Then reassess in 7–10 days.
Common mistakes when using HRV and resting heart rate for dieting
- Changing calories based on a single bad morning: HRV can drop after poor sleep, alcohol, or dehydration. Use the 2-day pattern rule to avoid overreacting.
- Switching devices or changing measurement conditions: different wear locations, different devices, or measuring after caffeine can distort HRV and RHR trends.
- Ignoring training load: if you keep hard training volume constant while dieting aggressively, HRV/RHR will reflect that stress. Calories alone may not be enough.
- Overcorrecting with large calorie swings: big changes can destabilize appetite and training. Use planned levels and small adjustments.
- Chasing a perfect HRV number: HRV fluctuates. The method is about trend and decision-making, not hitting a specific target.
- Assessing fat loss daily: daily weight is noisy. Use weekly averages and measurements.
- Using the method without a baseline: if you start immediately without collecting 10–14 days of data, you don’t know what “normal” looks like for you.
Additional practical tips and optimisation advice
Use consistent sleep and hydration to improve signal quality
HRV is strongly influenced by sleep quality and recovery habits. If you want your HRV and RHR to be useful for calorie decisions, protect the inputs:
- Keep sleep and wake times consistent when possible.
- Avoid alcohol during the adjustment period since it can depress HRV for days.
- Hydrate consistently. Extreme dehydration or sudden changes can raise RHR.
Separate “diet stress” from “life stress”
If you have a major work deadline, travel, or a stressful week, HRV may reflect that even if your training and calories are appropriate. In those cases, it’s reasonable to follow the stressed-recovery rule while also recognizing that you may need more time to normalize. The method still works, but the cause of the stress may not be your deficit.
Choose a realistic protein and fiber floor during calorie changes
When you raise or lower calories, keep your nutrition structure stable so the only meaningful variable is total energy. A practical approach is to hold:
- Protein intake steady (supports lean mass during dieting)
- Fiber intake steady (helps satiety and digestion)
Then adjust primarily via carbohydrates and fats depending on training days and recovery status. This makes the HRV-driven changes easier to interpret.
Make one change at a time when possible
If HRV/RHR show stress and progress slows, resist the urge to change everything at once. A controlled approach is:
- First: adjust calories using the recovery deficit.
- Second: adjust training volume/intensity for 24–72 hours.
- Third: reassess after 7–10 days.
This prevents “conflicting signals” that make it hard to know what helped.
Use recovery days as a performance strategy, not a failure
When the method flags stressed recovery, your goal is not to abandon the deficit forever. It’s to create enough recovery capacity to keep training effective and to prevent a prolonged fatigue loop. Many successful fat-loss phases include planned “recovery” days where calories are higher and training load is reduced.
Example week showing how to apply the rules
- Mon–Tue: HRV is near baseline and RHR is normal. You train as planned and eat your default deficit (e.g., 2210 kcal).
- Wed–Thu: HRV drops and RHR rises for two mornings in a row. You treat recovery as stressed.
- Fri: you switch to the recovery deficit (e.g., 2350 kcal) and reduce training volume (fewer sets, no intensity peaks).
- Sat–Sun: HRV rebounds and RHR returns toward baseline. You go back to the default deficit and resume normal training.
Over time, this pattern helps you keep the deficit consistent enough to drive fat loss while preventing recovery from repeatedly breaking.
Relevant device considerations (without locking you into one brand)
Most HRV and RHR systems work on the same principle: they estimate autonomic balance and resting cardiovascular strain. The key is consistency. If you use a smartwatch, ensure the sensor is worn similarly each day. If you use a chest strap, keep placement stable. Whatever you choose, prioritize stability of measurement over chasing the most “advanced” display.
faq_html

07.05.2026. 07:14