

Moisturizer Making Skin Worse? Barrier Support Routine: How to Fix

Goal: stop the moisturizer reaction and rebuild your skin barrier
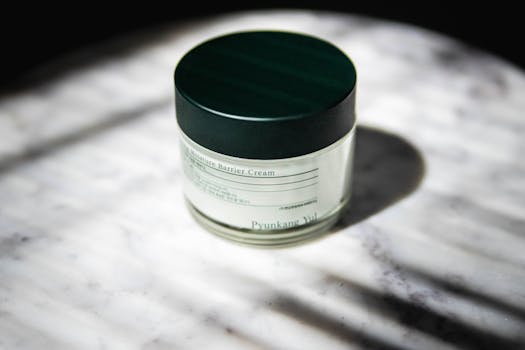
If your moisturizer is making your skin worse, your goal isn’t to “find a better moisturizer” right away. Your goal is to reduce irritation, calm inflammation, and give your barrier the conditions it needs to recover. When your barrier is compromised, even products that usually work for other people can trigger stinging, redness, tightness, flaking, or new breakouts. The fix is a structured routine that lowers risk, supports barrier repair, and helps you identify what’s driving the problem.
This guide walks you through a barrier-support routine you can implement immediately, plus a method to troubleshoot the most common causes of “moisturizer making skin worse barrier support routine how to fix” situations.
Preparation: set up a simple, low-risk test environment
Before you change anything, prepare your routine so you can clearly observe what’s happening. Barrier recovery is easier when your skin isn’t being constantly exposed to multiple new variables.
What you need
A gentle cleanser (non-foaming or low-foaming) that doesn’t leave your skin squeaky-clean
One barrier-support moisturizer you’ll use consistently during the test period
Optional: a bland occlusive (like petrolatum) for targeted sealing on very dry areas
Optional: plain, fragrance-free sunscreen for daytime
Timer and a notebook or notes app to track symptoms (stinging, redness, itch, bumps) at set times
How to choose your “test” moisturizer
For the first 7–14 days, pick a moisturizer that is designed to be barrier-friendly and low-irritant. Look for:
Ceramides, cholesterol, fatty acids, or glycerin listed early
Minimal fragrance and no essential oils
A formula that doesn’t feel extremely tingly or hot on first application
If you’re currently using a moisturizer that contains multiple potential irritants (strong fragrance, high alcohol content, or known actives), don’t keep it in the test. Remove it from your routine so you can isolate the cause.
Set a symptom tracking baseline
For 2 days before changes, track:
How your skin feels right after cleansing (0–10 discomfort scale)
What happens 30 minutes after moisturizing
What happens 12–24 hours later (redness, bumps, dryness, flaking)
Whether symptoms are localized (around mouth, eyes, cheeks) or widespread
This baseline helps you see progress. Barrier repair often improves in small steps rather than overnight.
Step-by-step: implement a barrier support routine that stops the “worse” cycle
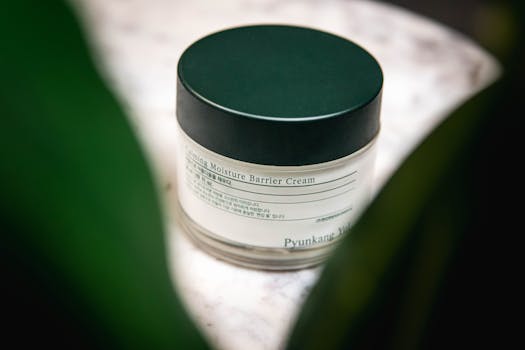
Follow these steps in order. If you skip steps, it’s harder to tell what helped.
1) Pause the problematic moisturizer and any “extra” actives
Stop using the moisturizer that makes your skin worse. Also pause for now:
Exfoliating acids (AHA/BHA/PHA)
Retinoids (retinol, retinal, prescription tretinoin)
Vitamin C in low-pH forms
Scrubs, cleansing brushes, and face masks with acids
Spot treatments that sting
You’re removing variables so your barrier can calm down. If you’re using multiple actives, even one can keep the barrier irritated while you’re trying to fix it.
2) Cleanse gently, once daily if you’re reactive
For the next 3–5 days, use a gentle cleanser:
Use lukewarm water (not hot)
Cleanse for 30–45 seconds
Pat dry with a soft towel—no rubbing
If your skin is very reactive, consider cleansing once daily at night and using water only in the morning. The goal is to reduce barrier stress while you stabilize irritation.
3) Apply moisturizer to slightly damp skin within 60 seconds
Right after cleansing (or rinsing), leave your skin slightly damp. Then apply your barrier-support moisturizer within 1 minute. This timing helps humectants (like glycerin) pull water into the outer layers rather than sitting on fully dry skin.
Use a thin layer first. If you tend to get stinging, avoid heavy rubbing. Press the product in with your fingertips.
4) Use the “thin layer, wait, then repeat” method for 2–3 days
If your skin is irritated, a thick coat can increase the chance of discomfort or pilling that traps irritants. Instead:
Apply a thin layer of moisturizer
Wait 2–3 minutes
If there’s still tightness or dryness, apply a second thin layer
Stop if you feel burning. Mild warmth from friction is different from true burning. Burning is your signal to simplify further.
5) Seal only the driest patches with a bland occlusive (optional)
If you have visible roughness, flaking, or cracking, seal those areas after your moisturizer with a very small amount of petrolatum or a similar bland occlusive. Use it like a “lid,” not a full-face mask.
Practical example: if your cheeks feel tight and look flaky, apply moisturizer to your whole face, then dab a pea-sized amount of petrolatum only on the flaking zones. This can reduce water loss without overloading the rest of your skin.
Do this for 3–7 days, then reassess. Over-occluding can worsen clogged pores for some people.
6) Add sunscreen carefully during the day
Barrier repair depends on sun protection, but sunscreen can also irritate reactive skin. For daytime:
Choose a fragrance-free, barrier-friendly sunscreen
Apply after moisturizer
Use enough to get protection, but avoid layering multiple products
If sunscreen stings more than usual, don’t keep layering. You may need a different formula while your barrier is sensitive.
7) Reintroduce products one at a time after 7–14 days of stability
Once your skin stops reacting (less redness, less stinging, reduced flaking), reintroduce only one paused product at a time. Keep the barrier-support moisturizer constant.
Use a simple schedule:
Day 8–10: add back one gentle treatment (for many people this is a low-frequency hydrator or a mild retinoid only if tolerated)
Wait 3–4 days before adding anything else
If irritation returns, remove the last reintroduced product
This method prevents you from guessing. You’ll know exactly what triggered the worsening.
Troubleshooting: why your moisturizer might be making skin worse
When you’re trying to fix “moisturizer making skin worse,” the issue is usually one of these. Use your symptom pattern to narrow it down.
1) Irritant contact dermatitis from fragrance, essential oils, or high alcohol content
Common signs:
Immediate stinging or burning
Redness that appears quickly after application
Symptoms worsen each time you apply the product
Fix: simplify. Remove fragrance-heavy formulas. During barrier repair, choose moisturizers with minimal scent and fewer “warming” or “tingling” ingredients.
2) Allergic contact dermatitis (less predictable, often delayed)
Common signs:
Itching and redness that peaks later (often 12–48 hours)
Dry patches that spread beyond where you applied
Reactions that repeat with the same product
Fix: stop the product and treat your skin gently for 1–2 weeks. If reactions keep happening with multiple moisturizers, consider patch testing with a dermatologist.
3) Too many layers or too much product causing pilling and friction
Common signs:
Dryness plus little bumps where product gathers
Stinging from rubbing
Flaking that looks worse after you moisturize
Fix: apply less, press in, and avoid rubbing. Keep your routine to 2–3 steps during repair.
4) Acneiform breakouts from heavy occlusives or certain emollients
Common signs:
New clogged pores or small uniform bumps
Breakouts concentrated on cheeks, chin, or forehead
No major burning or redness—more “congestion” than irritation
Fix: use a lighter barrier moisturizer and limit occlusives to flaky patches only. If you’re prone to acne, avoid full-face petrolatum unless your skin is extremely dry.
5) Active ingredients inside your moisturizer
Some moisturizers include exfoliating acids, retinoids, or strong anti-acne complexes. If your barrier is already stressed, actives can worsen dryness and redness.
Fix: during the repair window, choose a plain barrier moisturizer without exfoliating or acne actives.
Common mistakes that keep skin getting worse
These errors are extremely common when your moisturizer isn’t working.
1) Switching products every day
Frequent changes can make you feel like nothing works. Skin needs time to settle. Give your barrier-support routine 7 days before judging it.
2) Over-cleansing or using hot water
Even gentle cleansers can be too much if you cleanse twice daily during a flare. Hot water strips lipids and increases tightness.
3) Applying moisturizer to fully dry skin
Without dampness, humectants can’t do their job as effectively. You can end up with a “drying” feel even though you applied moisturizer.
4) Layering multiple actives on top of irritation
If you’re stinging, your skin is telling you it’s not ready. Skip actives until the burning and redness are clearly improved.
5) Ignoring localized triggers
Sometimes the problem isn’t your whole routine. It’s a trigger zone: hairline, mask area, around the mouth from toothpaste exposure, or under-eye irritation from product migration. Adjust application technique and watch for patterns.
Additional practical tips and optimisation advice

Once you’ve stabilized the routine, fine-tune your approach so barrier support sticks.
Use a “less is more” routine for 10–14 days
During barrier recovery, your routine should typically include:
Gentle cleanser (once daily or as needed)
Barrier-support moisturizer (2 thin layers if needed)
Sunscreen in the morning
Everything else goes on hold. This reduces the chance that you’ll keep re-irritating your barrier while you’re trying to repair it.
Try a patch test on a small area
If you’re switching moisturizers, test it on a small area of your jaw or behind the ear for 2–3 days. Apply it the way you would normally. If you get stinging or a rash-like reaction, you’ll know early and avoid full-face exposure.
Adjust frequency before changing ingredients
If your skin is sensitive, you may do better with:
Moisturizer once daily at first, then increase to twice daily as tolerated
Night-only application during the first 3–4 days if mornings are more reactive
Sometimes the skin can tolerate the formula but not the timing or frequency during an active flare.
Watch for “puffiness” and weeping as signs of significant irritation
If you notice swelling, oozing, or severe burning that doesn’t settle within a few minutes, stop the product and simplify further. Persistent or worsening reactions may require medical evaluation, especially if you have eczema, rosacea, or a history of contact dermatitis.
Real-world scenario: fixing a flare caused by a “plumping” moisturizer
Imagine you use a moisturizer marketed for immediate hydration. The first few days feel fine, then you start getting stinging on application and redness around the mouth. You also notice tiny bumps along the cheeks after moisturizing.
Here’s how you’d apply this guide:
Day 1: stop that moisturizer and pause acids/retinoids
Day 2–3: cleanse gently once daily, apply a simple ceramide-based moisturizer to damp skin within 60 seconds
Day 4–7: use thin layer, wait 2–3 minutes, repeat only if tightness persists
Day 8–14: when calm, reintroduce one product at a time, starting with the simplest treatment
By separating barrier repair from “active” hydration claims, you reduce the chance that a single ingredient group keeps triggering your flare.
How to tell barrier recovery is working
You’re not looking for perfection. You’re looking for clear improvement. Typical signs include:
Less stinging when applying moisturizer
Reduced tightness after cleansing
Fewer flakes within 5–10 days
More comfortable skin after sunscreen
If you see no change after 14 days of a simplified routine, reassess: you may be dealing with an allergy, an infection, or a product compatibility issue that needs targeted evaluation.
When to consider professional help
Seek medical advice if you have severe swelling, spreading rash, crusting, intense pain, or if your skin keeps worsening despite a 2-week simplified barrier routine. If you suspect contact allergy, a dermatologist can help with patch testing and treatment options.
Step-by-step checklist you can follow today
If you want a quick action plan, use this checklist. It keeps you on track and reduces guesswork.
1) Remove the moisturizer that makes skin worse
Stop it immediately. Don’t “power through.”
2) Cleanse gently for 3–5 days
Use lukewarm water, cleanse 30–45 seconds, pat dry.
3) Apply barrier moisturizer within 60 seconds on damp skin
Start with a thin layer. Wait 2–3 minutes. Add a second thin layer only if needed.
4) Seal only dry patches if flaking is present
Use a small amount of bland occlusive on targeted areas.
5) Hold actives and exfoliants for 7–14 days
Reintroduce one product at a time after your skin stabilizes.
6) Track symptoms at 30 minutes and 12–24 hours
Stinging suggests irritant triggers. Delayed itch/redness suggests possible allergy.
7) Adjust based on the pattern, not on guesswork
If you’re getting burning, simplify further. If you’re getting clogged pores, lighten the texture and limit occlusives.
Following this approach gives your barrier a real chance to recover—and helps you pinpoint the reason your moisturizer was making skin worse so you can build a routine that feels stable again.
08.02.2026. 04:43